PixLab
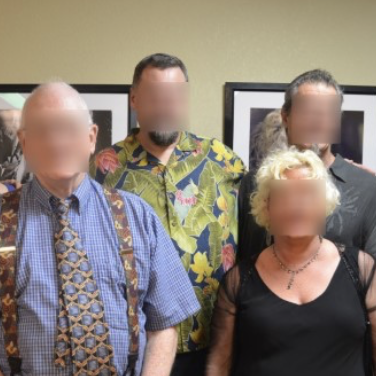
AutomationProcess and analyze input media images or video content. Allows you to process, transform, and filter any images from any programming language with machine vision and deep learning APIs. Filter images and video frames according to their NSFW score and apply a blur filter if adult or bloody content is detected using only two PixLab endpoints. Scan government issued documents such as Passports, Visas or ID cards from various countries and automatically extract any detected face via a single PixLab endpoint. Detect input language & extract text content from a given image using state-of-the-art Machine Learning algorithms. Detect all human faces present in a given image first then blur or extract each one of them via a set of PixLab endpoints. Learn how to make a simple program that superpose a flower crown or dog facial members on top of any detected face using only three PixLab endpoints.
📚 Documentation & Examples
Everything you need to integrate with PixLab
🚀 Quick Start Examples
// PixLab API Example
const response = await fetch('https://pixlab.io/home', {
    method: 'GET',
    headers: {
        'Content-Type': 'application/json'
    }
});

const data = await response.json();
console.log(data);
Discovering PixLab API
If you're a developer looking for an image and video analysis tool to integrate with your code, PixLab API might be a good choice for you. With PixLab API, you can analyze, manipulate, and tag your images and videos in different programming languages.
Getting Started with PixLab API
Before getting started with PixLab API, you need to sign up for an account to obtain your API key. The API key is the unique identifier to access the API. Once you have that, you can start using the API by calling one of the endpoints with your API key.
Here are some examples of how to make a request using PixLab API in JavaScript:
// Import the required libraries.
const fetch = require("node-fetch");

// Set the endpoint URL and parameters.
const url = "https://api.pixlab.io/blur";
const apiKey = "YOUR_API_KEY";
const imgURL = "https://example.com/image.jpg";
const radius = 10;

// Set the headers to include your API key.
const headers = {"Content-Type": "application/json", "key": apiKey};

// Make the request using fetch.
fetch(`${url}?img=${imgURL}&radius=${radius}`, { headers: headers })
  .then(res => res.json())
  .then(json => console.log(json))
  .catch(err => console.error(err));
In this example, we use the node-fetch library to make a request to the blur endpoint with a given image URL and a blur radius. The response will be returned in JSON format.
For more information about how to use the different endpoints available in PixLab API, consult their official documentation.
Conclusion
PixLab API is a powerful tool that can help you analyze and manipulate your images and videos in different programming languages. With the provided examples, you should be able to quickly start using the API. Happy coding!